I can't believe my Google AdSense application or request has
been accepted. It has taken me about a week and a half to get this
approval. I was so frantically aiming for this clearance that it was a hectic
time. How come I'm saying this? One of the reliable online paying platforms on
the internet is the Google AdSense monetization scheme. If you have access then
it is worthwhile to work on, there is no joke or fraud. After reading countless
blog entries on the subject of how to get this approval, I have come to the
conclusion that getting it is pretty simple. I will therefore briefly describe
in this article how I was able to obtain GOOGLE ADSENSE APPROVAL in a matter of
days. The truth of the matter is that you have to be proactive in order to
secure this opportunity and you will be a happy man whiles you continue to put
your content out there.
In fact, I have experimented with
many things I wasn't "supposed" to whiles discovering ways to
get AdSense approval. This article tends to disapprove of the analogies that
have been used to describe how to gain approval on different platforms.
You might need to read The three things to consider in order to establish or
maintain a successful blog before reading this very article. I will again
entreat you to read both parts one and two about how to
acquire Google AdSense approval in days rather than a month. Reading those
articles will help to ensure proper comprehension.
Point 1: Check your
number of words.
If you truly want this
approval within days, you must examine your word count. I discussed utilizing a
good text editor in my earlier article to help you detect and fix any spelling
and grammar faults. However, knowing the number of words as you type can also
be helped by using a competent text editor like Microsoft Word. The day after
and each time I applied for Google AdSense, I received an error
message saying, "You need to fix some issues before your site is
ready for AdSense." I used to compose words that ranged from 300 to 360. The
thing is, you have to do a lot of research so that you will be grounded and
understand the thing you did for approval. As a newbie, do not start with short
articles. Well, I have not properly examined this issue but then, if you prefer
writing short articles (fewer words like say brief news), then write more before
applying to Google AdSense else start with a topic that can help you write
more.
Point 2: Connect or link your blog to Google Search Console
Your website must be linked to the Google search panel. The day
after I applied, I started getting errors merely because of that. Go to the
Google search interface.
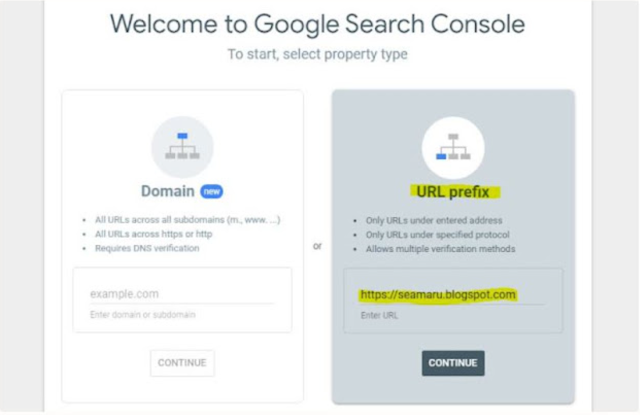
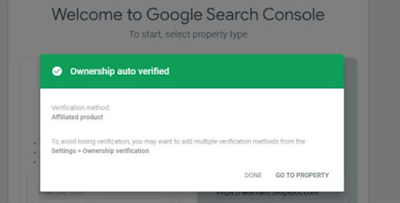
You'll see that you have to select a property, and you can do so using either a domain name or a URL prefix. I advise choosing the URL prefix option if you're using the free.blogspot.com domain. After entering your complete blog URL, including the HTTPS, click next. You will receive a pop-up notification informing you that the ownership of your blog has been automatically validated. Congratulations!
Point 3: Index your articles after publishing.
You might need to index every blog post. The system algorithms that determine whether Google will index your blog post or other content at the URL inspection page take user demand and quality checks into account. Due to the fact that your post has been added to the Google Search Engine database, it allows the Google crawler to access your website or post. On the Google search console page, this is possible. Find URL inspection on your extreme left and click it. After, the cursor will blink in a text field at the top where you can submit your link or article’s URL for indexing.
After that, click on "request
indexing" as seen in the image below. This can follow a live test
which shows at the top after you have indexed your article's URL. The URL
will then be subjected to a live test by the tool to check for any obvious
indexing issues; if none are found, you will be notified just as if some issues
need to be fixed. Try to fix any problems with the procedure, though, if there
are any.
Has this article been helpful? Share with us if you are still encountering some issues regarding this article.


